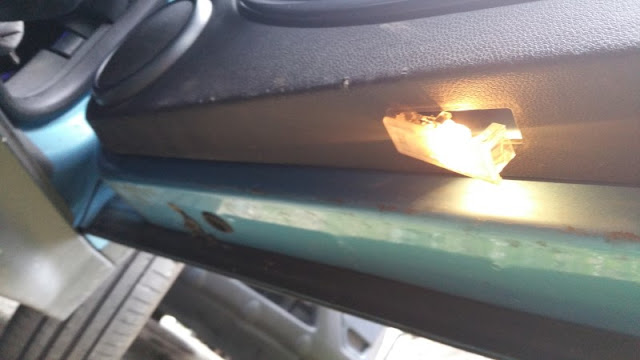
We all love customising our Minis, and one of the easiest ways is to fit some coloured LEDs lights. In this instance I'm replacing the interior map lights and main interior light, plus the puddle and footwell lights and sidelights. All simple jobs.
FRONT MAP LIGHTS
The front map lights are accessed by getting your fingers inbetween the housing and the headlining and pushing forwards (towards windscreen) and pulling down gently.
This reveals the circuit board. There are two knobs which house the lightbulbs. Turn these anti-clockwise to extract the bulbs.
Here are the two bulbs, the new LED one on the left. Pull out the old bulb and push in the new one. Refit in reverse order. **Note Some LED bulbs only work one way around. If you find your LED bulb is not working after fitting, try fitting it in the other way round.
FOOTWELL LIGHTS

Use your fingernails to pry the plastic cover out of its housing.
Swap the bulbs over and refit.
REAR MAP LIGHTS
Firstly you need to take the light cover off. Use your fingers or a small flat headed screwdriver to take it off by squeesing from both sides.
Use a screwdriver to remove the retaining screws.
This allows access to the rear of the light and the circuitboard.
Again, rotate the black knobs anti-clockwise to extract the bulbs. Replace the bulbs in the housing and refit.
PUDDLE LIGHTS
These are one-piece units that fit as a straight replacement for the OEM items.
Locate your puddle light under the door.
Pry it off using fingernails or small flat screwdriver.
Detach the wiring connector and remove the bulb and holder.
The new light fits as a one-piece. Fit the connector into the unit.
Slot it back in to place. All done.
INTERIOR LIGHT
The interior light LED replacement is super easy. Take off the cover (pinch) and remove the main bulb and replace with the LED item. Replace the cover.
FRONT SIDELIGHTS
Replacing the front sidelights is again pretty easy. Word of warning though, if you are buying LEDs as replacements then make sure they fit! We ordered some LEDs that were just too long to fit in the light housing, so had to order some shorter ones!
 |
| These are too long!! |
The original bulb
The sidelight bulb is housed inside the bumper next to the indicator (the big connector). Access the bulb by twisting its (smaller) connector anti-clockwise and pulling out.
Sidelight connector is the small black one shown on the left and the indicator connector is the big white one (covered in tar).
The old bulb extracted.
Remove the old bulb.
Replace with the new LED bulb.
Check to make sure the bulb works before refitting into the housing.
 Refit into housing.
 Turn it on and...
Hey presto... LED sidelights.


No comments:
Post a Comment